THE FINANCIAL OPERATING SYSTEM FOR SMALL CONTRACTORS
THE FINANCIAL OPERATING SYSTEM FOR SMALL CONTRACTORS
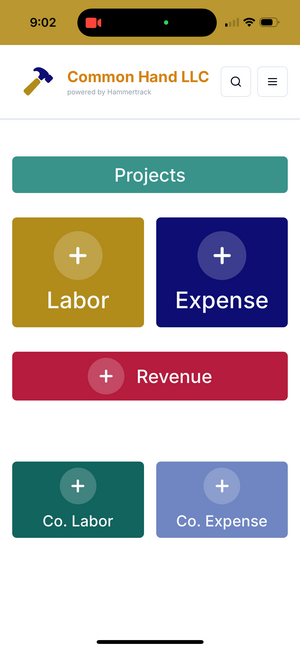
The dashboard is the home screen, but more importantly, it is also the action screen... 90-95% of your Hammertrack activity will be adding pieces of information, so the buttons to Add Labor or Add Expense to a Project (the most frequently used buttons, by far) are front and center as soon as you open the app.

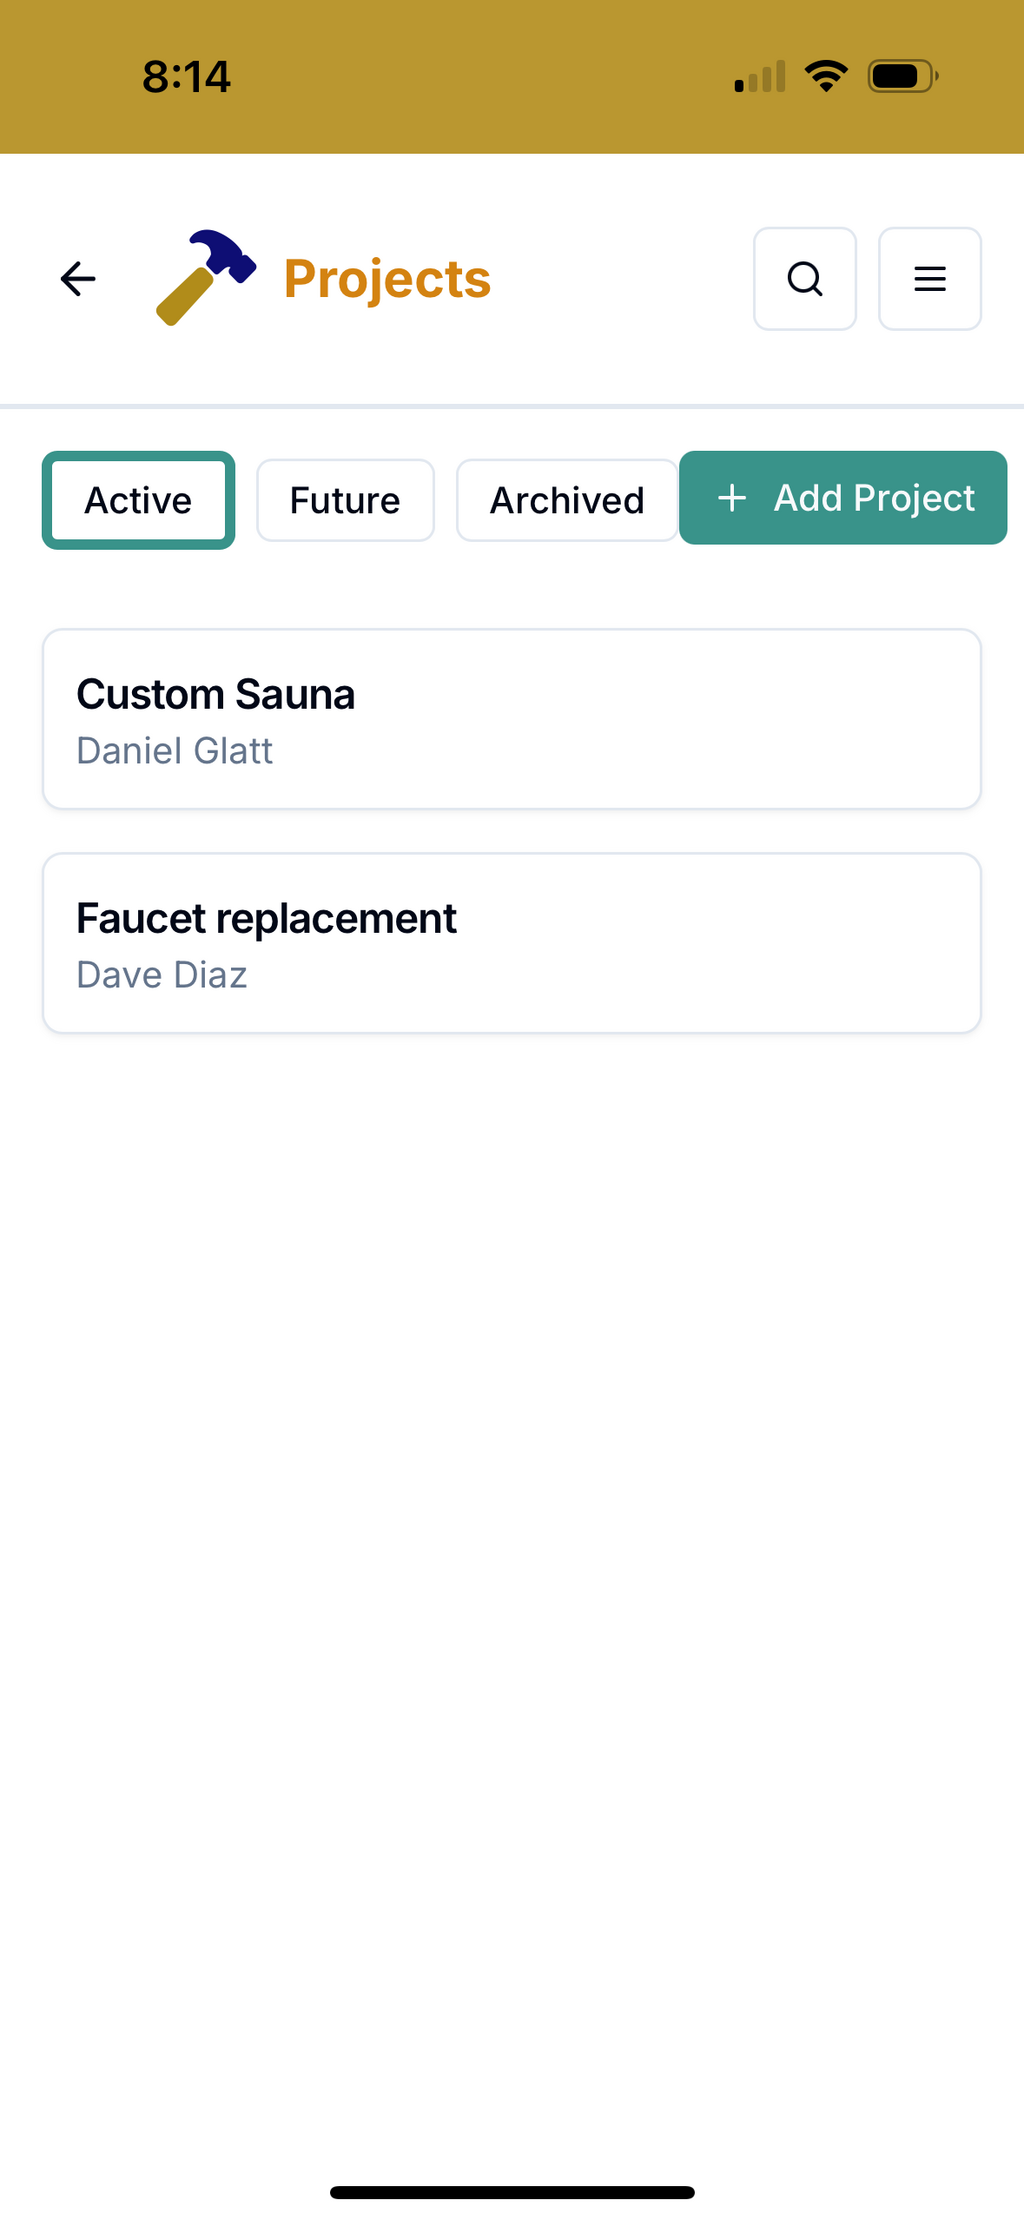
Not surprisingly, Projects are how your work and transactions are organized in Hammertrack. You'll need to add at least one Project before you can Add Labor or Add Expense. Tap the Projects button to see a list of existing Projects or to add a new Project.
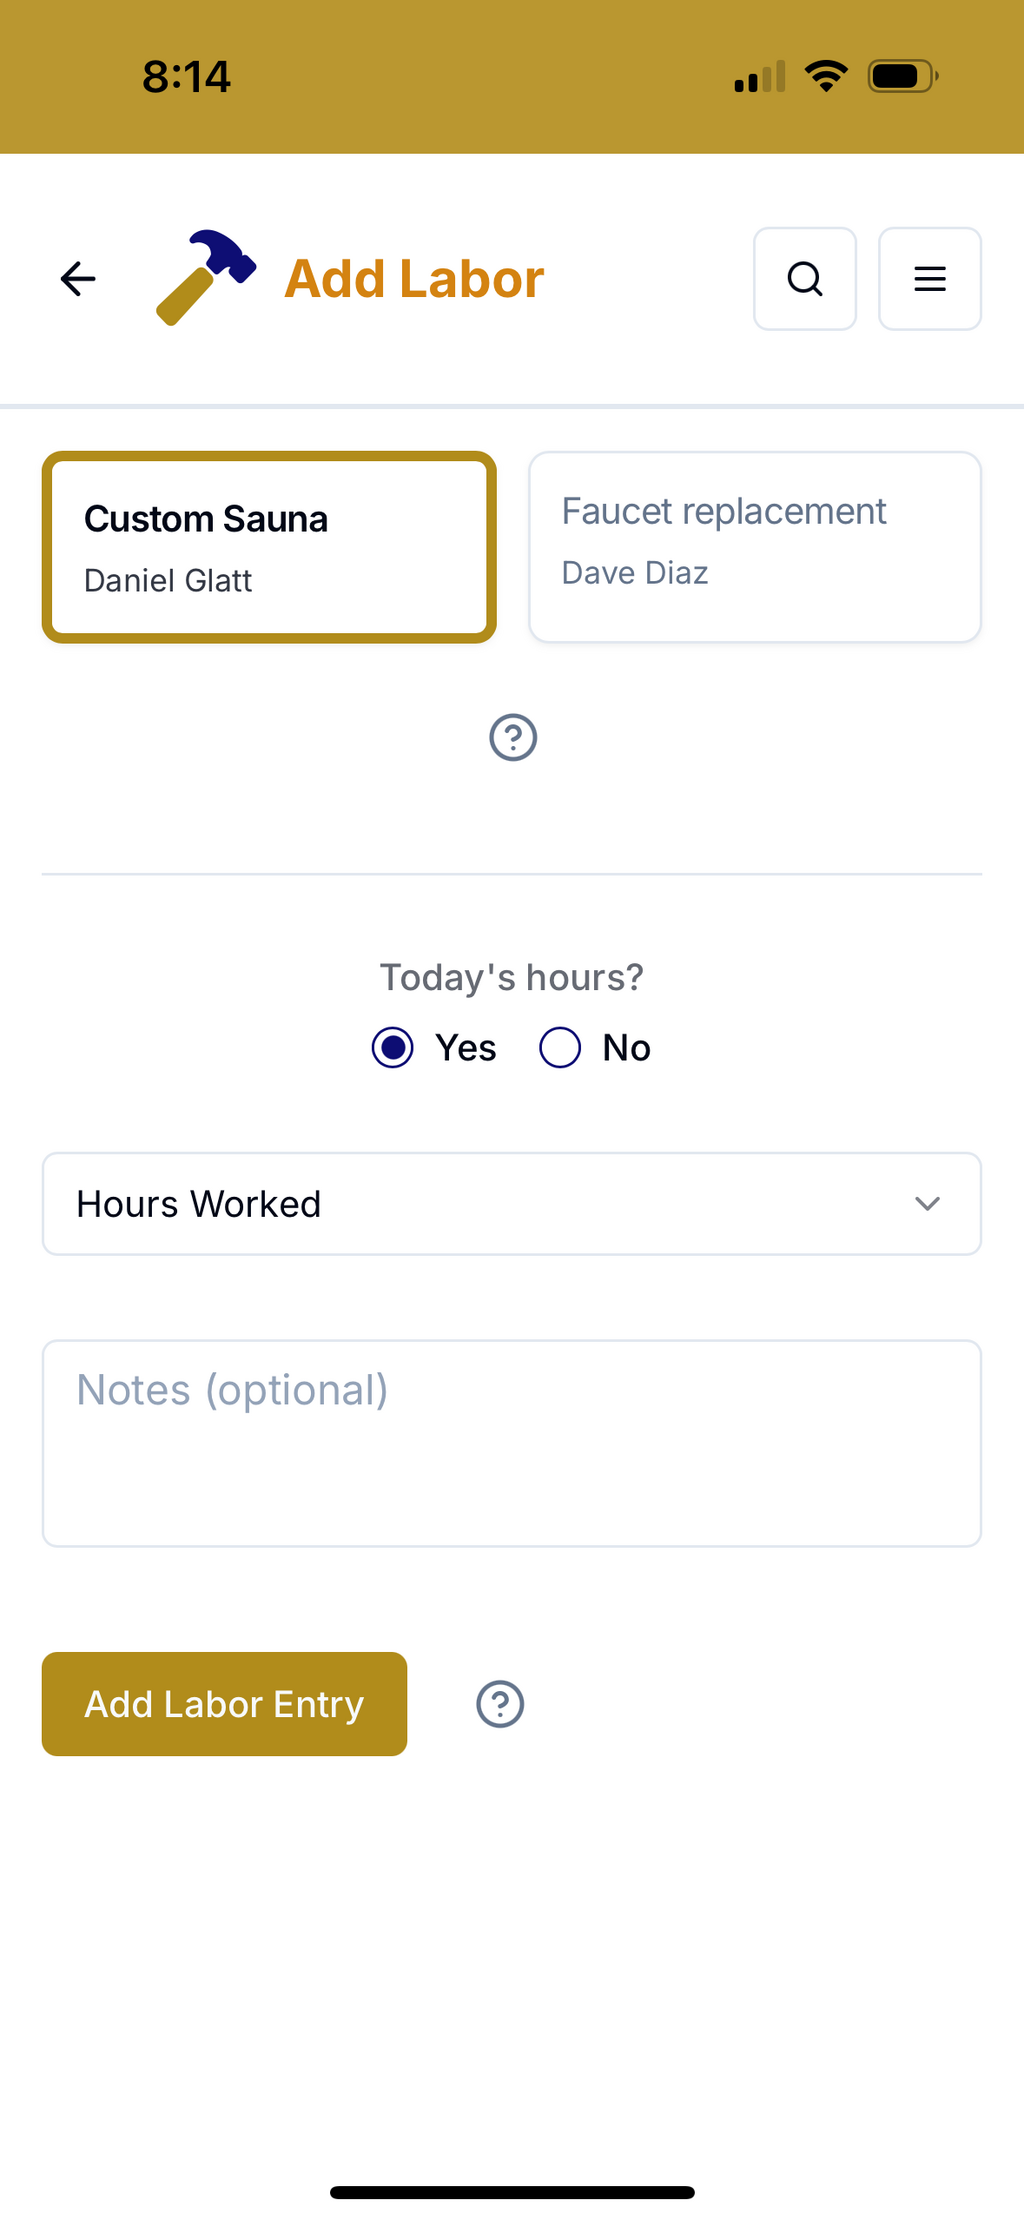
When you tap on the Add Labor button, you'll see a very simple screen designed for speed... at the top is the Project field--the Project with the most recent activity in the app will appear first and be pre-selected, but all projects with an "Active" status will be listed and selectable.
Next the date--the default is today's date, but if you tap "No", a date-picker will pop up so you can choose a different day.
The Hours Worked dropdown comes next(listed in quarter-hour increments). No typing needed--just scroll and tap to select.
And finally, the Notes section... add some notes to describe what you accomplished during those billable hours. Keep it short but provide enough information so that you can refer to it later, if necessary.
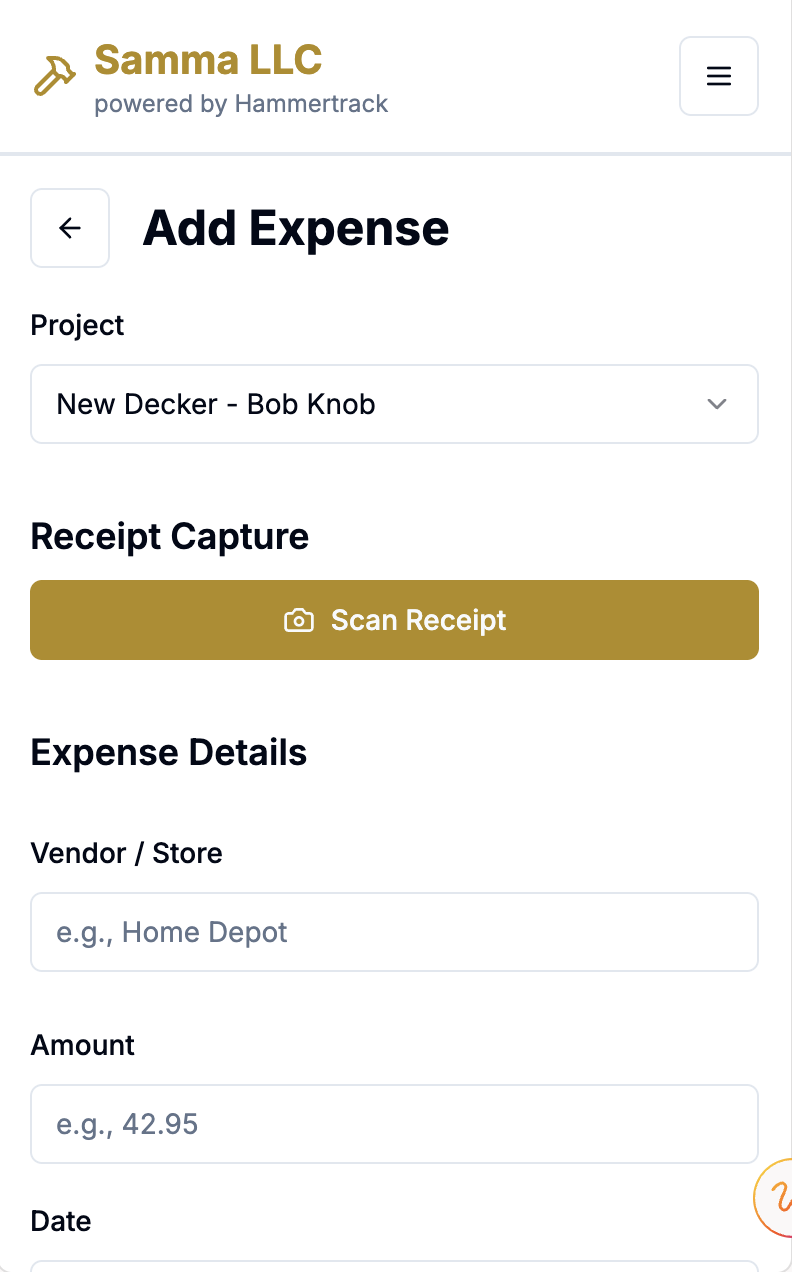
After you tap Add Expense:
If you decide to stop using Hammertrack, can you still access those receipts? Absolutely. After you cancel your subscription, you won't be able to create new projects or add new labor hours or new receipts, but you'll still be able to log in and will have access to your existing data for at least 12 months after your subscription is cancelled.
Also, while your data is safely stored in Google's Cloud with built-in redundancy, we encourage you to download Project data whenever you want--there's a button on the Project Details page to do just that. In addition, whenever you change the status of a Project from Active to Archived (presumably because the Project is fully completed), we'll prompt you to hit that download button so that you have a copy of the Project's data stored locally on your own computer.

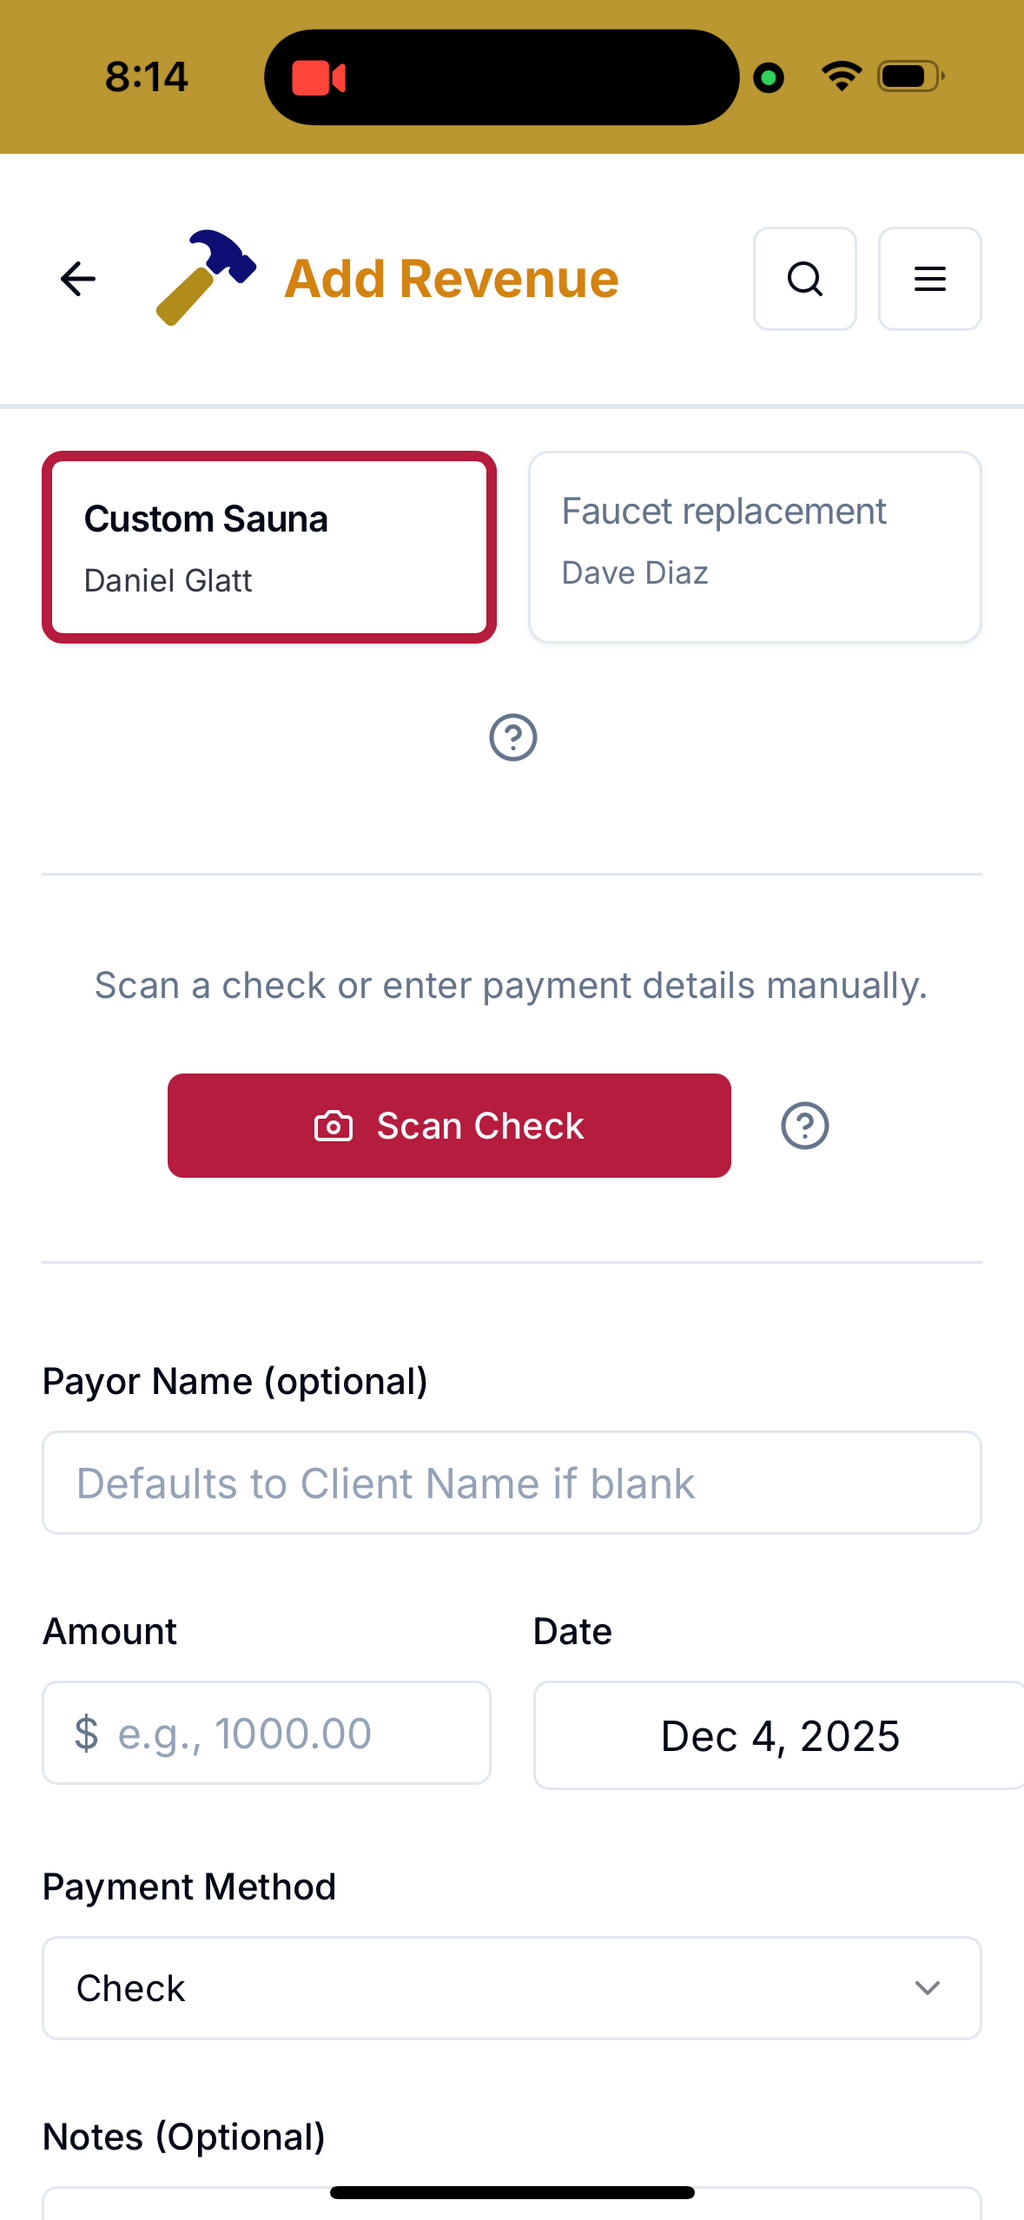
The Add Revenue workflow is very similar to the Add Expense workflow... choose the Project and tap Scan Check to take a photo of it and have the app extract the data, or add the details manually. Once again, the image will be saved for record-keeping and future review, so you can ditch the paper (after you deposit the check, of course).
Want to email a statement/receipt to the client showing the payment you just received? You can do it on the spot through the app.
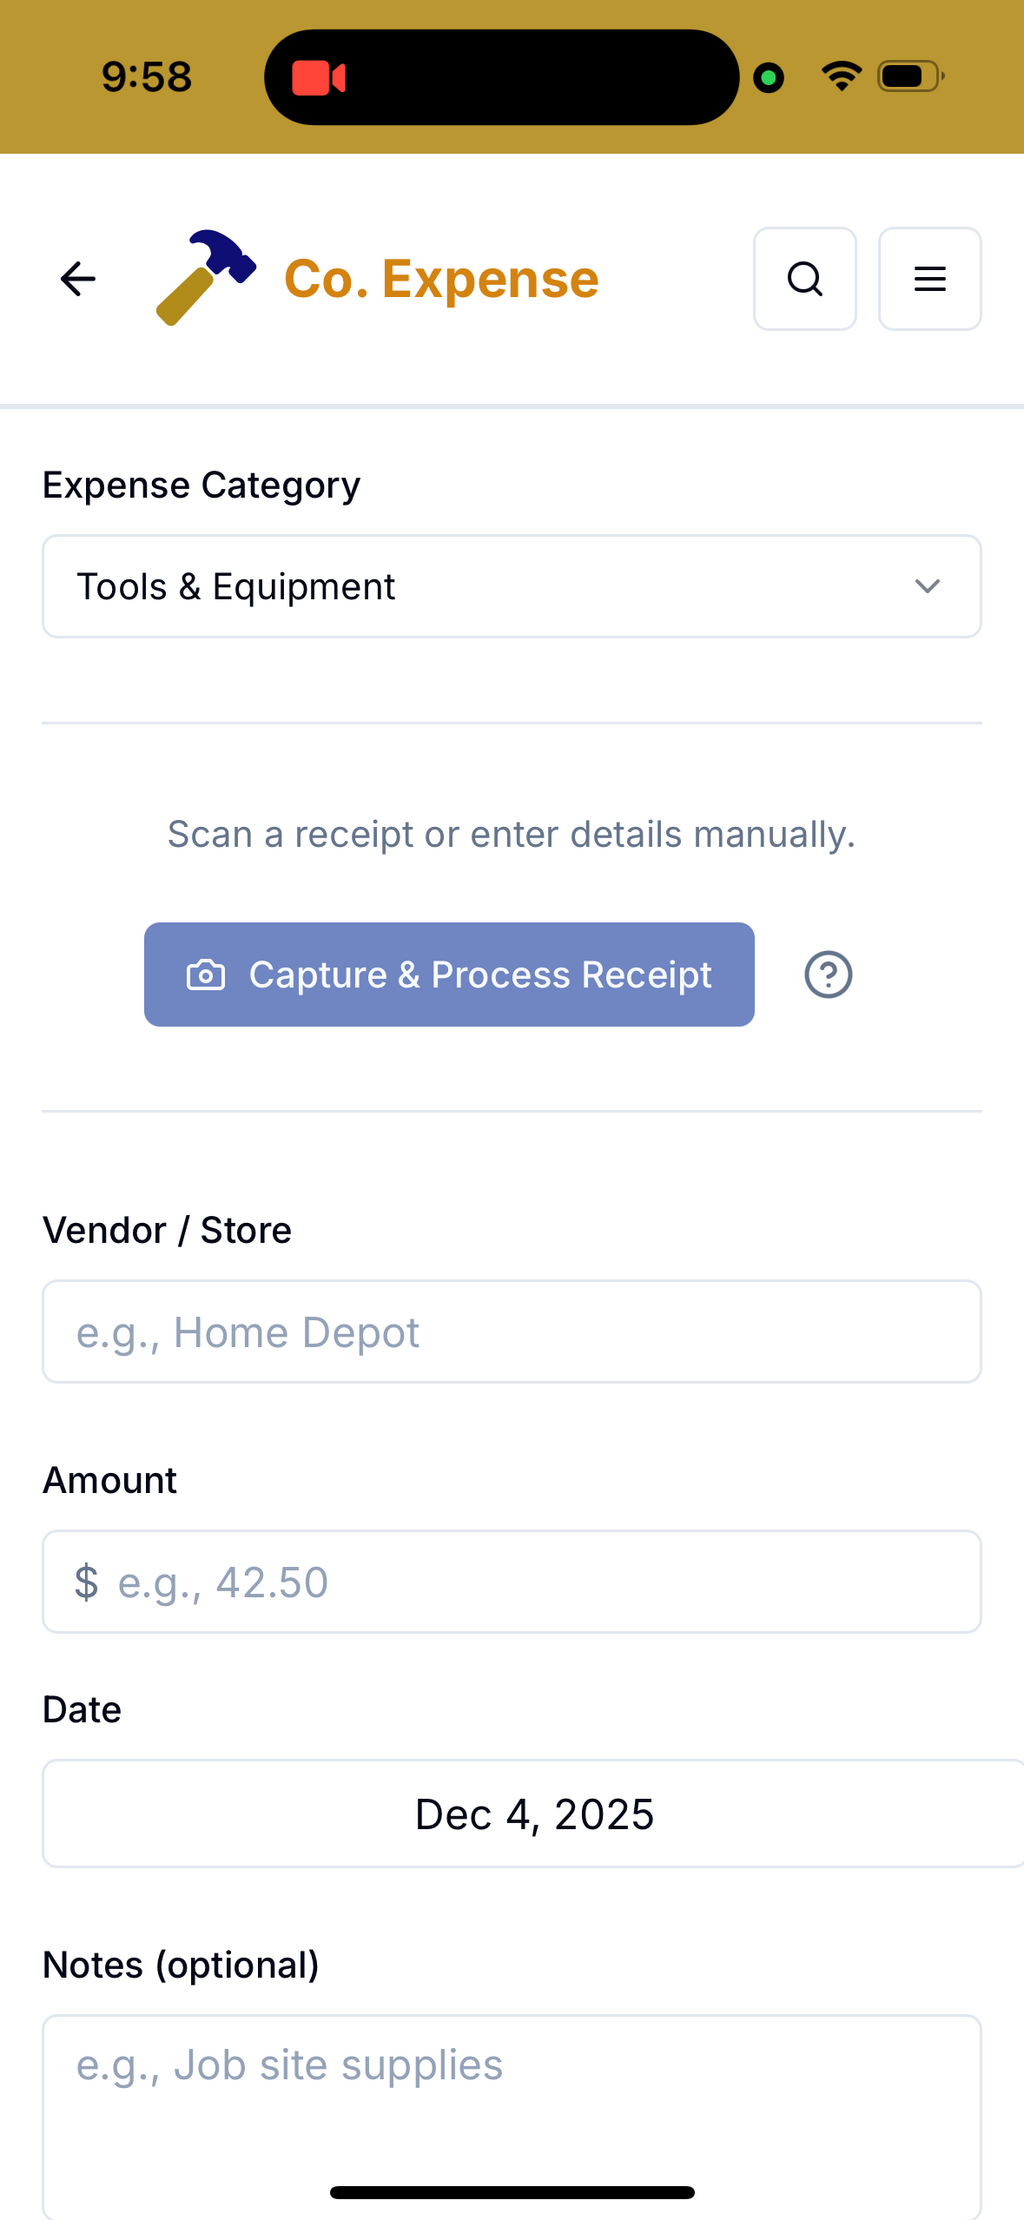
Adding a Company Expense works the same way as adding an expense to a Project, but you'll select a Category for each expense you add (and you have full control over which Categories appear here by going to Company Settings).
You'll find that adding Company Labor is exactly like adding labor to a Project.

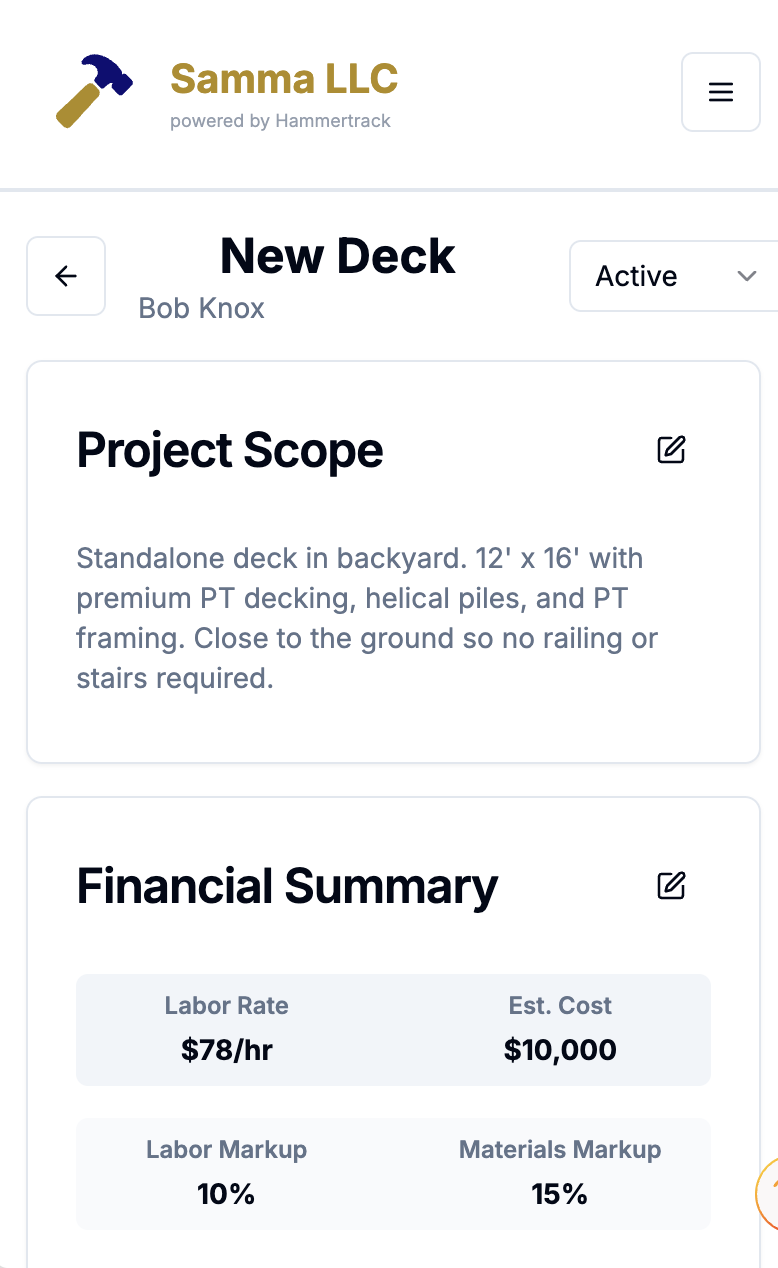
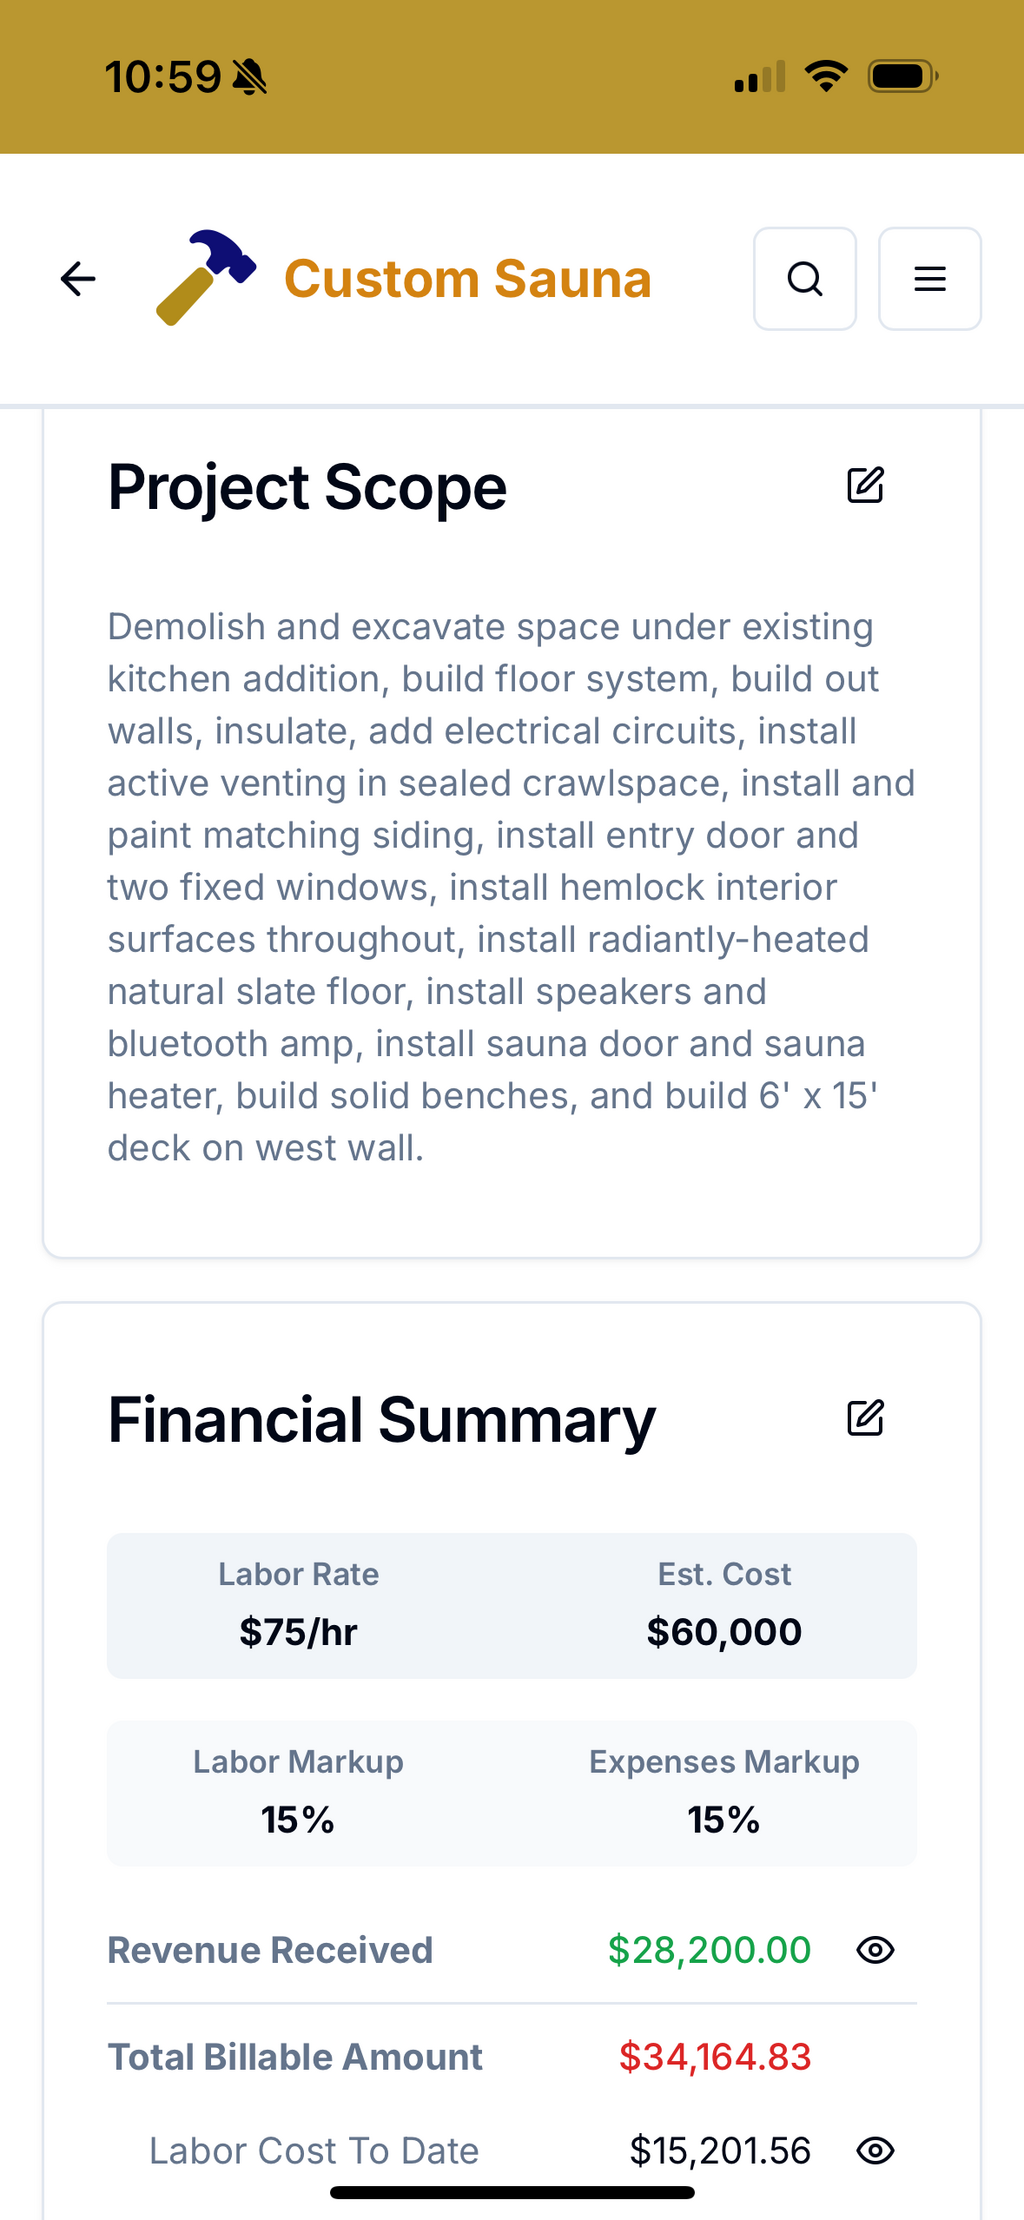
Once you have created a Project, and it's listed on the Projects screen, tapping on that Project brings you to its Project Details screen where you can view the details, make changes, and update the Project's status. You'll also see a Financial Summary, and finally, at the bottom, you'll see list of recent transactions related to this Project.
There are three Project statuses... Active for Projects that are in-progress, Future for Projects that are prospective or scheduled but not started, and Archived for Projects that are completed or that were prospective but never begun.
You can also generate documents related to that Project including summaries of Labor, Expenses, and Revenue. In addition, you can generate a Statement that you can email to the client on the spot. Statements display the description of the project, amounts due (choose summarized or itemized), and payments received, so they can serve as both invoices and receipts.
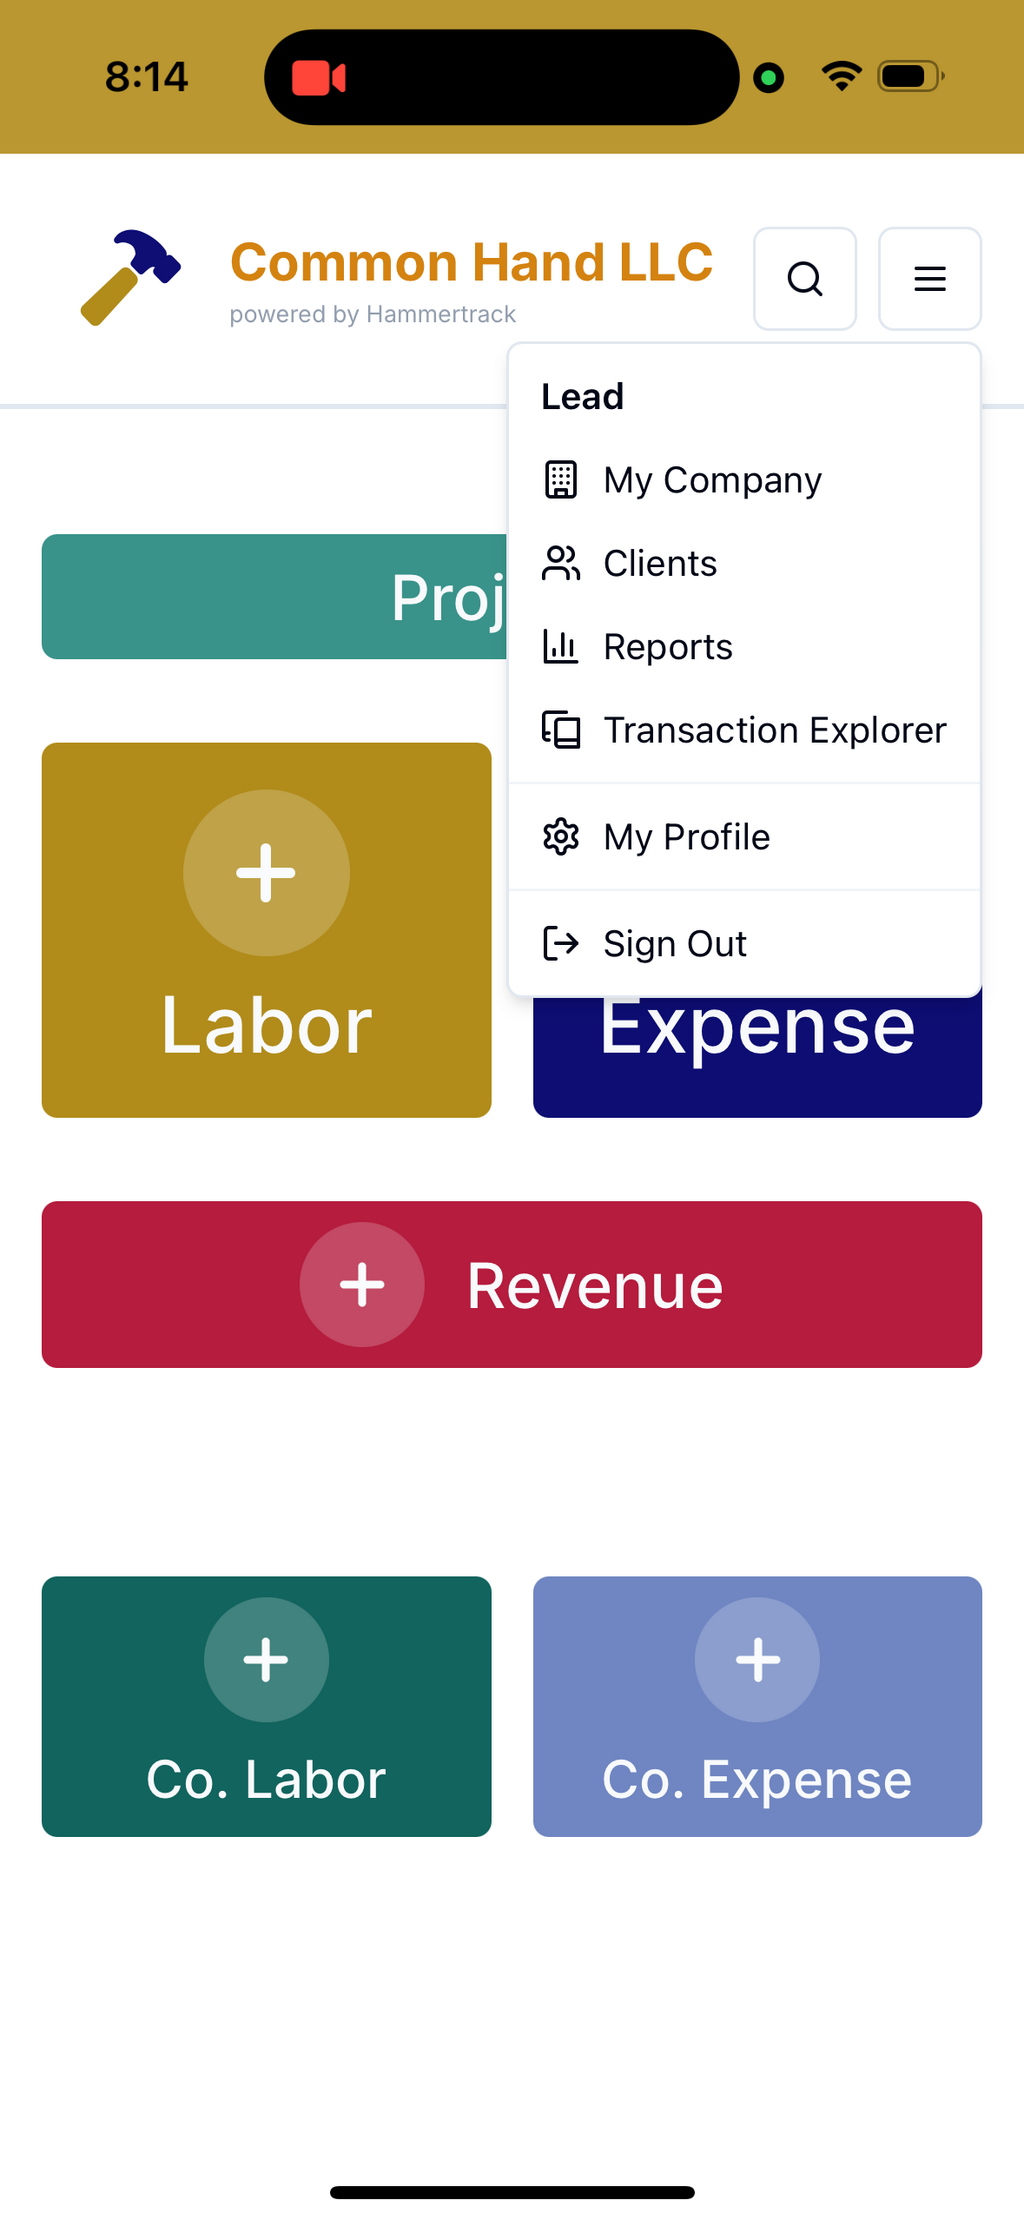
You can generate company financial summaries by going to the hamburger menu in the upper right corner of the dashboard.
The dashboard is the home screen, but more importantly, it is also the action screen... 90-95% of your Hammertrack activity will be adding pieces of information, so the buttons to Add Labor or Add Expense to a Project (the most frequently used buttons, by far) are front and center as soon as you open the app.
Not surprisingly, Projects are how your work and transactions are organized in Hammertrack. You'll need to add at least one Project before you can Add Labor or Add Expense. Tap the Projects button to see a list of existing Projects or to add a new Project.
When you tap on the Add Labor button, you'll see a very simple screen designed for speed... at the top is the Project field--the Project with the most recent activity in the app will appear first and be pre-selected, but all projects with an "Active" status will be listed and selectable.
Next the date--the default is today's date, but if you tap "No", a date-picker will pop up so you can choose a different day.
The Hours Worked dropdown comes next(listed in quarter-hour increments). No typing needed--just scroll and tap to select.
And finally, the Notes section... add some notes to describe what you accomplished during those billable hours. Keep it short but provide enough information so that you can refer to it later, if necessary.
After you tap Add Expense:
If you decide to stop using Hammertrack, can you still access those receipts? Absolutely. After you cancel your subscription, you won't be able to create new projects or add new labor hours or new receipts, but you'll still be able to log in and will have access to your existing data for at least 12 months after your subscription is cancelled.
Also, while your data is safely stored in Google's Cloud with built-in redundancy, we encourage you to download Project data whenever you want--there's a button on the Project Details page to do just that. In addition, whenever you change the status of a Project from Active to Archived (presumably because the Project is fully completed), we'll prompt you to hit that download button so that you have a copy of the Project's data stored locally on your own computer.
The Add Revenue workflow is very similar to the Add Expense workflow... choose the Project and tap Scan Check to take a photo of it and have the app extract the data, or add the details manually. Once again, the image will be saved for record-keeping and future review, so you can ditch the paper (after you deposit the check, of course).
Want to email a statement/receipt to the client showing the payment you just received? You can do it on the spot through the app.
Adding a Company Expense works the same way as adding an expense to a Project, but you'll select a Category for each expense you add (and you have full control over which Categories appear here by going to Company Settings).
You'll find that adding Company Labor is exactly like adding labor to a Project.
Once you have created a Project, and it's listed on the Projects screen, tapping on that Project brings you to its Project Details screen where you can view the details, make changes, and update the Project's status. You'll also see a Financial Summary, and finally, at the bottom, you'll see list of recent transactions related to this Project.
There are three Project statuses... Active for Projects that are in-progress, Future for Projects that are prospective or scheduled but not started, and Archived for Projects that are completed or that were prospective but never begun.
You can also generate documents related to that Project including summaries of Labor, Expenses, and Revenue. In addition, you can generate a Statement that you can email to the client on the spot. Statements display the description of the project, amounts due (choose summarized or itemized), and payments received, so they can serve as both invoices and receipts.
You can generate company financial summaries by going to the hamburger menu in the upper right corner of the dashboard.
Tap on Reports.